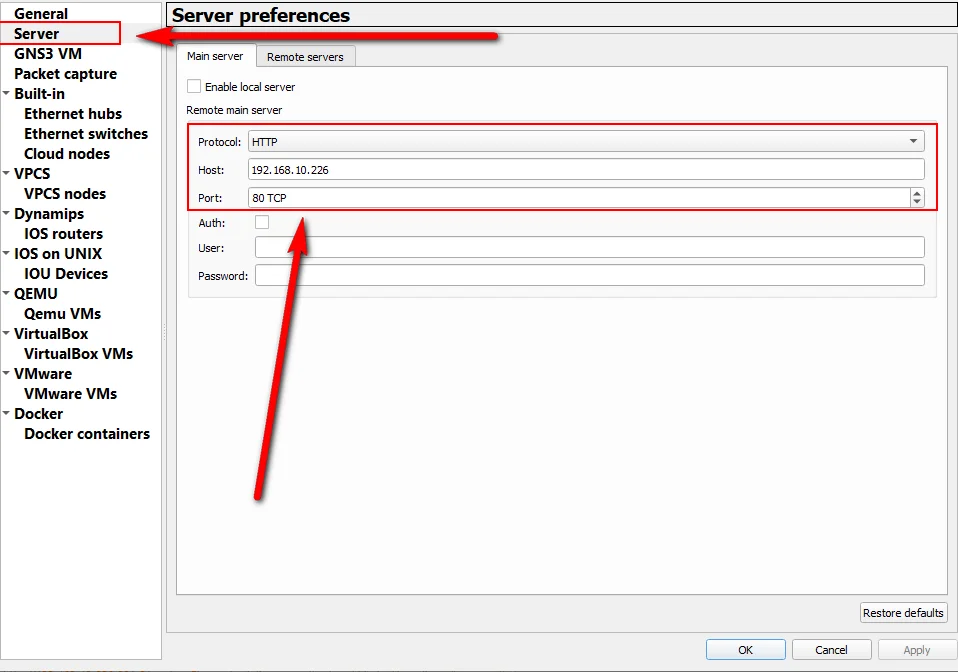
How to install GNS3 Full Pack on VMware Workstation! (short video)
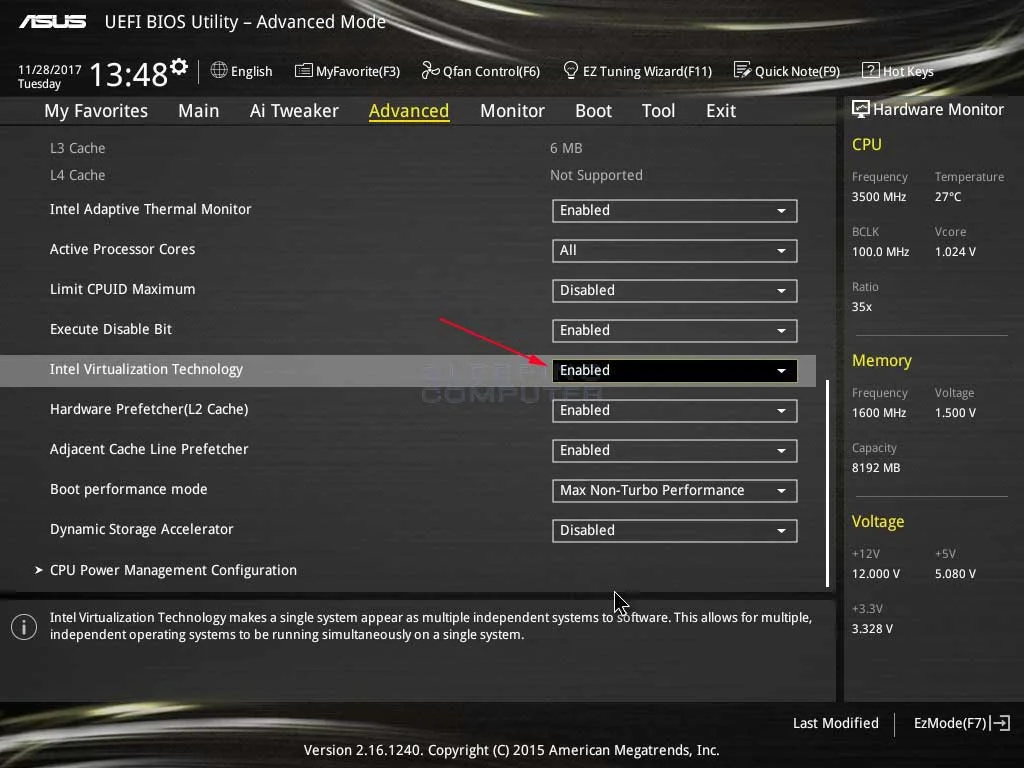
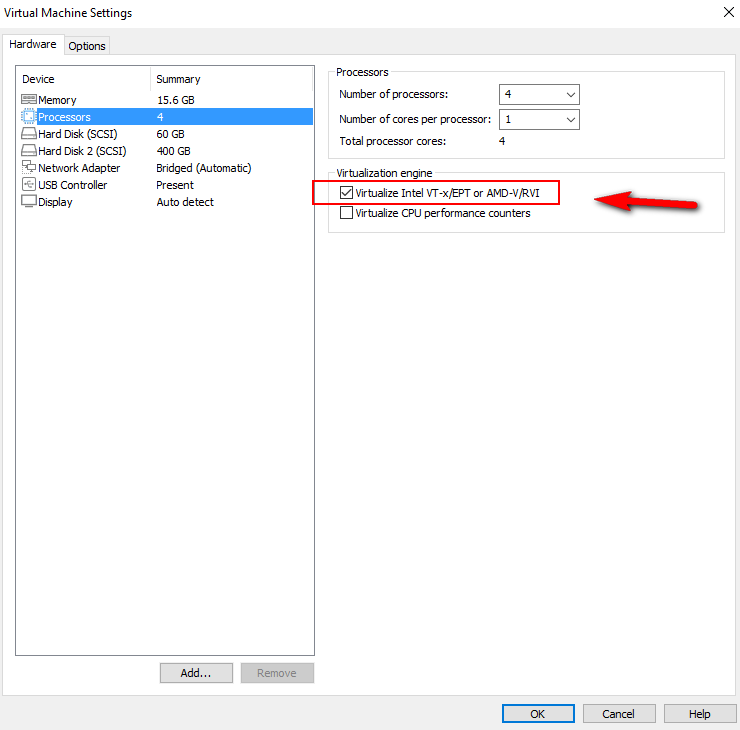
How to Enable Virtualization on BIOS PC and GNS3 VM

Note:

  • You must enable Virtualization to run Qemu Node on VM.  
  • You have to make sure Virtualization is enabled in your BIOS
How to fix –> Module “HV” power on failed error
1) add more vcpu in your gns3 vm
2) run CMD as an administrator and apply this command –> bcdedit /set hypervisorlaunchtype off   –> then reboot your system and check the gns3 VM processor again (make sure VT is ticked) and then start your gns3 VM
3) if still can’t boot without an issue please visit the link below
 
 
Watch the below video
Windows 11 virtualization errors: Virtualized Intel VT-x/EPT is not supported on this platform

“Nested virtualization error”

Note: In Windows 11 and Windows 10 latest, you should allow Virtualization in BIOS, but you also have to go into Windows Features and manually disable security features prohibiting Virtualization. You have to „untick“

1. Go to Control Panel → Programs → Enable or disable Windows features.
2. Uncheck all the features of Windows Hypervisor.
3. In the Windows search bar, search for “core isolation” and open it.  
4. In the core isolation settings, disable memory integrity.

You can find the details on this link.  How to disable Hyper-V on Windows for BlueStacks 4 – BlueStacks Support

How to install GNS3 Full Pack in ESXi (short video)
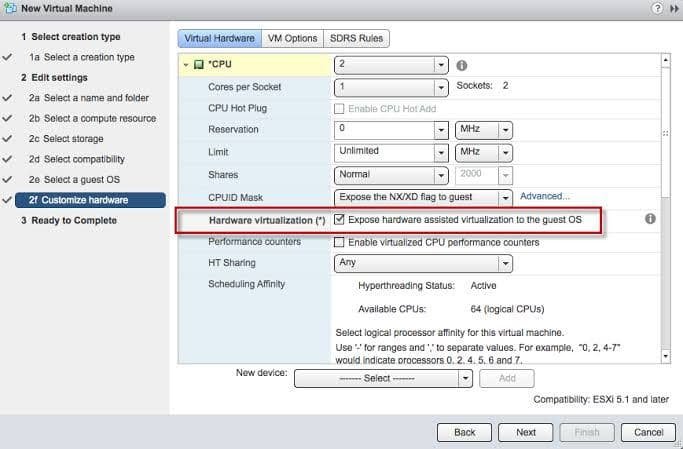
Enable virtualization on ESXI

eve-ng virtualization

Troubleshooting:

How to add GNS3 a static IP
How to Connect GNS3 Windows App to GNS3 VM?
Install GNS3 on a Mac with GNS3 VM and Fusion

Note: after installing the GNS3 full pack like the below video, you need to go to edit –> preferences –> server in your gns3 software on your MAC and first “untick” Enable local server (screenshot below) and then add your gns3 VM IP and select OK

Screenshot

How to upgrade GNS3 Full Pack to the latest version!

Note for Upgrade GNS3 VM

if you see any error during the upgrade, you need to login into the shell using ssh in gns3 VM and run the below commands (username and password are gns3/gns3)

:~$ sudo -s (gns3′ user can ‘sudo -s’ to be root)

:~$ apt-get update

:~$ apt-get upgrade

:~$ reboot

Then run the upgrade VM again

How to fix SHA Digest of the file doesn’t match manifest, VMware workstation 16?
  • First, try to upload the eve-ng full pack to another disk drive (SSD recommended) and not a USB external drive
  • Source drive where you deploy eve-ng VM should not be the same as Destination where the VM located
  • Make sure you have at least 150GB of free space (where you deploy OVF file)
  • extract downloaded part 1 and 2 with 7zip and try uploading again
  • delete .MF file and try upload again
  • You can fix this issue with VMware OVF Tool Have a look at this link or download the PDF format of the link

Welcome back!

Sign in to your account

Before You Leave...
A Special Gift Just for You!

Download EVE-NG Cisco Labs for FREE

If you are interested in exploring EVE-NG Cisco Labs,
you can now download EVE-NG Cisco Labs for FREE!